Latest Updates
Showing posts with label widget. Show all posts

How to Add Google+ Official Badge to Blogger

4 comments:

How to Add Google+ Official Badge to Blogger


              Google+ provides its official badge to promote your Page/Yourself on your blog/website. Google provides two different types of badges. The first one is of Portrait style which shows your profile picture, cover photo, name, a short description and follow button and the second one is Landscape which shows your name/page name, profile picture and follow button. Lets Check How to Add Google+ Official Badge to Blogger


How to Create Google+ Badge for Blogger:

  • First Log in to your Google+ account.
  • Go to this page
  • Select your Account/Page for which you want to create a badge
  • Now Customize with your choice.
How to Add Google+ Official Badge to Blogger


How to Add Google+ Official Badge to Blogger


  • Login to Blogger Account.
  • Go to Layout → Add a Gadget → HTML/JavaScript.

How to Add Google+ Official Badge to Blogger


  • Now Past that Code in Box
  • Then Save it.


Read More

Top 4 CSS Style Navigation Menu Bar for Blogger

16 comments:


For having an attractive blog design your blog must have a good navigation menu design.Today i am going to share a beautiful CSS Style navigation Menu bar to blogger blogs. This navigation menu is designed using CSS and HTML only .Jquery menu slow down your blog loading time. So today I am sharing pure CSS and HTML drop down menu for your blogger blog.


How To Add CSS Style Menu Bar In Blogger


  • Go to Blogger Dashboard → Layout.
  • Click on Add a Gadget → HTML/JavaScript
  • Now add the following code and change Red links with yours.


CSS Style Menu Bar 1 :


<style>
.nbw-menu li{text-align:right;margin-bottom:15px;line-height:30px;list-style:none; }
.nbw-menu li ul{margin-top:15px}
.nbw-menu a{color:white;background:#009AFF;font-weight:normal;font-size:14px;text-decoration:none;padding:7px 12px;-webkit-transition:all .25s linear;-moz-transition:all .25s linear;transition:all .25s linear}
.nbw-menu a:hover{text-decoration:none;color:#FFFFFF;background:#292929}li.widget ul{list-style:circle}<blockquote>
</style>
<ul class='nbw-menu'>
<li class='cat-item'><a href='#'>Adsense</a></li>
<li class='cat-item'><a href='#'>Announcements</a></li>
<li class='cat-item'><a href='#'>Blogger News</a></li>
<li class='cat-item'><a href='#'>Blogger SEO</a></li>
<li class='cat-item'><a href='#'>Blogger Templates</a></li>
<li class='cat-item'><a href='#'>Blogger Widgets</a></li>
<li class='cat-item'><a href='#'>Blogging Tips</a></li>
</ul>


CSS Style Menu Bar 2 :


<style type="text/css">/* #F93 *//* #C60 */#nbw-cssmenu{border:none;border:0;margin:0;padding:0;font:67.5% 'Lucida Sans Unicode','Bitstream Vera Sans','Trebuchet Unicode MS','Lucida Grande',Verdana,Helvetica,sans-serif;font-size:14px;font-weight:bold;width:auto}#nbw-cssmenu ul{background:#DFDFDF;height:50px;list-style:none;margin:0;padding:0;-webkit-border-radius:15px;-moz-border-radius:15px;border-radius:15px;-webkit-box-shadow:inset 0 16px 0 0 rgba(292929);-moz-box-shadow:inset 0 16px 0 0 rgba(292929);box-shadow:inset 0 16px 0 0 rgba(292929)}#nbw-cssmenu li{float:left;padding:0 0 0 15px}#nbw-cssmenu li a{color:#000;display:block;font-weight:normal;line-height:50px;margin:0;padding:0 25px;text-align:center;text-decoration:none}#nbw-cssmenu li a:hover{background:#292929;color:#292929;text-decoration:none;-webkit-box-shadow:inset 0 0 7px 2px rgba(0,0,0,0.3);-moz-box-shadow:inset 0 0 7px 2px rgba(0,0,0,0.3);box-shadow:inset 0 0 7px 2px rgba(292929)}#nbw-cssmenu ul li:hover a{background:#292929;color:#FFF;text-decoration:none}#nbw-cssmenu li ul{display:none;height:auto;padding:0;margin:0;border:0;position:absolute;width:200px;z-index:200}#nbw-cssmenu li:hover ul{display:block}#nbw-cssmenu li li{display:block;float:none;margin:0;padding:0;width:200px;background:#292929;/*this is where the rounded corners for the dropdown disappears*/}#nbw-cssmenu li:hover li a{background:none}#nbw-cssmenu li ul a{display:block;height:50px;font-size:12px;font-style:normal;margin:0;padding:0 10px 0 15px;text-align:left}#nbw-cssmenu li ul a:hover,#nbw-cssmenu li ul li:hover a{border:0;color:#292929;text-decoration:none;background:#ffffff;-webkit-box-shadow:inset 0 0 7px 2px rgba(292929);-moz-box-shadow:inset 0 0 7px 2px rgba(292929);box-shadow:inset 0 0 7px 2px rgba(292929)}</style><a href="http://newbloggerwidget.blogspot.com/" rel="dofollow" target="_blank" title="Drop Down Menus"><img src="https://blogger.googleusercontent.com/img/b/R29vZ2xl/AVvXsEjIT0vG9BwupcIXxvPX4FqA_-yeRHYHdAj3_wg38F9k9qZDaQPj0LRrHa54ObBGNvBrQlTMG7894LsJDiNiSo7mkU7L82DBN8Yb30z6Pj4LdunVtQpDbcV5n5V2nRqsHEhQwVSGzMqVRFY/h120/newbloggerwidget-blank.gif" alt="Drop Down Menus" border="0" style="position: fixed; bottom: 10%; right: 0%; top: 0px;" /></a><a href="http://newbloggerwidget.blogspot.com/" rel="dofollow" target="_blank" title="CSS Drop Down Menu"><img src="https://blogger.googleusercontent.com/img/b/R29vZ2xl/AVvXsEjIT0vG9BwupcIXxvPX4FqA_-yeRHYHdAj3_wg38F9k9qZDaQPj0LRrHa54ObBGNvBrQlTMG7894LsJDiNiSo7mkU7L82DBN8Yb30z6Pj4LdunVtQpDbcV5n5V2nRqsHEhQwVSGzMqVRFY/h120/newbloggerwidget-blank.gif" alt="CSS Drop Down Menu" border="0" style="position: fixed; bottom: 10%; right: 0%;" /></a><a href="http://newbloggerwidget.blogspot.com/" rel="dofollow" target="_blank" title="Pure CSS Dropdown Menu"><img src="https://blogger.googleusercontent.com/img/b/R29vZ2xl/AVvXsEjIT0vG9BwupcIXxvPX4FqA_-yeRHYHdAj3_wg38F9k9qZDaQPj0LRrHa54ObBGNvBrQlTMG7894LsJDiNiSo7mkU7L82DBN8Yb30z6Pj4LdunVtQpDbcV5n5V2nRqsHEhQwVSGzMqVRFY/h120/newbloggerwidget-blank.gif" alt="Pure CSS Dropdown Menu" border="0" style="position: fixed; bottom: 10%; left: 0%;" /></a><!-- Dont edit this CSS Drop Down Menu code or it will not work -->


<!-- customize your menus Links -->

<div id="nbw-cssmenu">
<ul>
<li class="active"><a href="#"><span>Home</span></a></li>
<li class="has-sub"><a href="#"><span>Products</span></a>
<ul>
<li><a href="#"><span>Widgets</span></a></li>
<li><a href="#"><span>Menus</span></a></li>
<li class="last"><a href="#"><span>Products</span></a></li>
</ul>
</li>
<li class="has-sub"><a href="#"><span>Company</span></a>
<ul>
<li><a href="#"><span>About</span></a></li>
<li class="last"><a href="#"><span>Location</span></a></li>
</ul>
</li>
<li class="last"><a href="#"><span>Contact</span></a></li>
</ul>
</div>


CSS Style Menu Bar 3 :


<style type="text/css">#nbw-cssmenu ul,#nbw-cssmenu li,#nbw-cssmenu span,#nbw-cssmenu a{margin:0;padding:0;position:relative}#nbw-cssmenu{height:49px;border-radius:5px 5px 0 0;-moz-border-radius:5px 5px 0 0;-webkit-border-radius:5px 5px 0 0;background:#fefefe;background:-moz-linear-gradient(top,#fefefe 0%,#eee9f0 100%);background:-webkit-gradient(linear,left top,left bottom,color-stop(0%,#fefefe),color-stop(100%,#eee9f0));background:-webkit-linear-gradient(top,#fefefe 0%,#eee9f0 100%);background:-o-linear-gradient(top,#fefefe 0%,#eee9f0 100%);background:-ms-linear-gradient(top,#fefefe 0%,#eee9f0 100%);background:linear-gradient(top,#fefefe 0%,#eee9f0 100%);border-bottom:2px solid #009AFF;width:auto}#nbw-cssmenu:after,#nbw-cssmenu ul:after{content:'';display:block;clear:both}#nbw-cssmenu a{background:#fefefe;background:-moz-linear-gradient(top,#fefefe 0%,#ececec 100%);background:-webkit-gradient(linear,left top,left bottom,color-stop(0%,#fefefe),color-stop(100%,#ececec));background:-webkit-linear-gradient(top,#fefefe 0%,#ececec 100%);background:-o-linear-gradient(top,#fefefe 0%,#ececec 100%);background:-ms-linear-gradient(top,#fefefe 0%,#ececec 100%);background:linear-gradient(top,#fefefe 0%,#ececec 100%);color:#000;display:inline-block;font-family:Helvetica,Arial,Verdana,sans-serif;font-size:12px;line-height:49px;padding:0 20px;text-decoration:none}#nbw-cssmenu ul{list-style:none}#nbw-cssmenu > ul{float:left}#nbw-cssmenu > ul > li{float:left}#nbw-cssmenu > ul > li > a{color:#000;font-size:12px}#nbw-cssmenu > ul > li:hover:after{content:'';display:block;width:0;height:0;position:absolute;left:50%;bottom:0;border-left:10px solid transparent;border-right:10px solid transparent;border-bottom:10px solid #009AFF;margin-left:-10px}#nbw-cssmenu > ul > li:first-child > a{border-radius:5px 0 0 0;-moz-border-radius:5px 0 0 0;-webkit-border-radius:5px 0 0 0}#nbw-cssmenu > ul > li.active:after{content:'';display:block;width:0;height:0;position:absolute;left:50%;bottom:0;border-left:10px solid transparent;border-right:10px solid transparent;border-bottom:10px solid #009AFF;margin-left:-10px}#nbw-cssmenu > ul > li.active > a{-moz-box-shadow:inset 0 0 2px rgba(0,0,0,0.1);-webkit-box-shadow:inset 0 0 2px rgba(0,0,0,0.1);box-shadow:inset 0 0 2px rgba(0,0,0,0.1);background:#ececec;background:-moz-linear-gradient(top,#ececec 0%,#fef ef 100%);background:-webkit-gradient(linear,left top,left bottom,color-stop(0%,#ececec),color-stop(100%,#fef ef));background:-webkit-linear-gradient(top,#ececec 0%,#fef ef 100%);background:-o-linear-gradient(top,#ececec 0%,#fef ef 100%);background:-ms-linear-gradient(top,#ececec 0%,#fef ef 100%);background:linear-gradient(top,#ececec 0%,#fef ef 100%)}#nbw-cssmenu > ul > li:hover > a{background:#ececec;background:-moz-linear-gradient(top,#ececec 0%,#fef ef 100%);background:-webkit-gradient(linear,left top,left bottom,color-stop(0%,#ececec),color-stop(100%,#fef ef));background:-webkit-linear-gradient(top,#ececec 0%,#fef ef 100%);background:-o-linear-gradient(top,#ececec 0%,#fef ef 100%);background:-ms-linear-gradient(top,#ececec 0%,#fef ef 100%);background:linear-gradient(top,#ececec 0%,#fef ef 100%);-moz-box-shadow:inset 0 0 2px rgba(0,0,0,0.1);-webkit-box-shadow:inset 0 0 2px rgba(0,0,0,0.1);box-shadow:inset 0 0 2px rgba(0,0,0,0.1)}#nbw-cssmenu .has-sub{z-index:1}#nbw-cssmenu .has-sub:hover > ul{display:block}#nbw-cssmenu .has-sub ul{display:none;position:absolute;width:200px;top:100%;left:0}#nbw-cssmenu .has-sub ul li{*margin-bottom:-1px}#nbw-cssmenu .has-sub ul li a{background:#009AFF;-webkit-transition:all .4s ease-in-out;-moz-transition:all .4s ease-in-out;-o-transition:all .4s ease-in-out;-ms-transition:all .4s ease-in-out;transition:all .4s ease-in-out;filter:none;font-size:11px;display:block;line-height:120%;padding:10px;color:#fff}#nbw-cssmenu .has-sub ul li:hover a{background:#292929}#nbw-cssmenu .has-sub .has-sub:hover > ul{display:block}#nbw-cssmenu .has-sub .has-sub ul{display:none;position:absolute;left:100%;top:0}#nbw-cssmenu .has-sub .has-sub ul li a{background:#009AFF; -webkit-transition:all .4s ease-in-out;-moz-transition:all .4s ease-in-out;-o-transition:all .4s ease-in-out;-ms-transition:all .4s ease-in-out;transition:all .4s ease-in-out;}#nbw-cssmenu .has-sub .has-sub ul li a:hover{background:#292929}</style><a href="http://newbloggerwidget.blogspot.com/" rel="dofollow" target="_blank" title="Drop Down Menus"><img src="https://blogger.googleusercontent.com/img/b/R29vZ2xl/AVvXsEjIT0vG9BwupcIXxvPX4FqA_-yeRHYHdAj3_wg38F9k9qZDaQPj0LRrHa54ObBGNvBrQlTMG7894LsJDiNiSo7mkU7L82DBN8Yb30z6Pj4LdunVtQpDbcV5n5V2nRqsHEhQwVSGzMqVRFY/h120/newbloggerwidget-blank.gif" alt="Drop Down Menus" border="0" style="position: fixed; bottom: 10%; right: 0%; top: 0px;" /></a><a href="http://newbloggerwidget.blogspot.com/" rel="dofollow" target="_blank" title="CSS Drop Down Menu"><img src="https://blogger.googleusercontent.com/img/b/R29vZ2xl/AVvXsEjIT0vG9BwupcIXxvPX4FqA_-yeRHYHdAj3_wg38F9k9qZDaQPj0LRrHa54ObBGNvBrQlTMG7894LsJDiNiSo7mkU7L82DBN8Yb30z6Pj4LdunVtQpDbcV5n5V2nRqsHEhQwVSGzMqVRFY/h120/newbloggerwidget-blank.gif" alt="CSS Drop Down Menu" border="0" style="position: fixed; bottom: 10%; right: 0%;" /></a><a href="http://newbloggerwidget.blogspot.com/" rel="dofollow" target="_blank" title="Pure CSS Dropdown Menu"><img src="https://blogger.googleusercontent.com/img/b/R29vZ2xl/AVvXsEjIT0vG9BwupcIXxvPX4FqA_-yeRHYHdAj3_wg38F9k9qZDaQPj0LRrHa54ObBGNvBrQlTMG7894LsJDiNiSo7mkU7L82DBN8Yb30z6Pj4LdunVtQpDbcV5n5V2nRqsHEhQwVSGzMqVRFY/h120/newbloggerwidget-blank.gif" alt="Pure CSS Dropdown Menu" border="0" style="position: fixed; bottom: 10%; left: 0%;" /></a><!-- Dont edit this CSS Drop Down Menu code or it will not work -->


<!-- newbloggerwidget -menus Links -->

<div id="nbw-cssmenu">
<ul>
<li class="active"><a href="#"><span>Home</span></a></li>
<li class="has-sub"><a href="#"><span>Products</span></a>
<ul>
<li class="has-sub"><a href="#"><span>Product 1</span></a>
<ul>
<li><a href="#"><span>Sub Item</span></a></li>
<li class="last"><a href="#"><span>Sub Item</span></a></li>
</ul>
</li>
<li class="has-sub"><a href="#"><span>Product 2</span></a>
<ul>
<li><a href="#"><span>Sub Item</span></a></li>
<li class="last"><a href="#"><span>Sub Item</span></a></li>
</ul>
</li>
</ul>
</li>
<li><a href="#"><span>About</span></a></li>
<li class="last"><a href="#"><span>Contact</span></a></li>
</ul>
</div>


CSS Style Menu Bar 4 :


<style type="text/css">@import url(http://fonts.googleapis.com/css?family=Open+Sans:600);/* Menu CSS */#newbloggerwidget-cssmenu,#newbloggerwidget-cssmenu > ul{background:url(https://blogger.googleusercontent.com/img/b/R29vZ2xl/AVvXsEjrnG0y8zumFhbyGFfwrl8KByaJZxt0IduJjRAyvSWQVtZzuufhiKgclWKn5aA1l_7HWvvI_W-TDx36UnWrRx46yJtI5Io6WPaQohxaeD6qdwS21JTajJtzH8jX7zDnpHXB4ReU-uBwANE/s1600/newbloggerwidget-highlight-bg.png) repeat;padding-bottom:3px;font-family:'Open Sans',sans-serif;font-weight:600}#newbloggerwidget-cssmenu:before,#newbloggerwidget-cssmenu:after,#newbloggerwidget-cssmenu > ul:before,#newbloggerwidget-cssmenu > ul:after{content:'';display:table}#newbloggerwidget-cssmenu:after,#newbloggerwidget-cssmenu > ul:after{clear:both}#newbloggerwidget-cssmenu{width:auto;zoom:1}#newbloggerwidget-cssmenu > ul{background:url(https://blogger.googleusercontent.com/img/b/R29vZ2xl/AVvXsEgRE8DUliiye9U_CX2HJFIviKRuWjf6MxzQLPnETncoaZW2a0lQueU6-qhJ9J13BZJAlOnxhOqddAlBw-wzF_TTCyT1brBVsYx7rp0wCC4JONrRvrQYdh6QUaGI6QEONnZdcQ-jIllXMVw/s1600/newbloggerwidget-menu-bg.png) repeat;margin:0;padding:0;position:relative}#newbloggerwidget-cssmenu > ul li{margin:0;padding:0;list-style:none}#newbloggerwidget-cssmenu > ul > li{float:left;position:relative}#newbloggerwidget-cssmenu > ul > li > a{padding:23px 26px;display:block;color:white;font-size:13px;text-decoration:none;text-transform:uppercase;text-shadow:0 -1px 0 #0d0d0d;text-shadow:0 -1px 0 rgba(0,0,0,0.7);line-height:18px}#newbloggerwidget-cssmenu > ul > li:hover > a{background:url(https://blogger.googleusercontent.com/img/b/R29vZ2xl/AVvXsEjrnG0y8zumFhbyGFfwrl8KByaJZxt0IduJjRAyvSWQVtZzuufhiKgclWKn5aA1l_7HWvvI_W-TDx36UnWrRx46yJtI5Io6WPaQohxaeD6qdwS21JTajJtzH8jX7zDnpHXB4ReU-uBwANE/s1600/newbloggerwidget-highlight-bg.png) repeat;text-shadow:0 -1px 0 #97321f;text-shadow:0 -1px 0 rgba(122,42,26,0.64)}#newbloggerwidget-cssmenu > ul > li > a > span{line-height:18px}#newbloggerwidget-cssmenu > ul > li.active > a,#newbloggerwidget-cssmenu > ul > li > a:active{background:url(https://blogger.googleusercontent.com/img/b/R29vZ2xl/AVvXsEgMo8VaMnPYs2A5fXeuv1DNkTrClXaM8Ezm-Rmjwy8l8MRAv9VhLNU3cob-3h__djNORXL7PIhJ717fiyze09nBdukr-Lph7FC2W0ex6dfqqWGV5uWjgwntKOuRidDQh3a0svoj6YsTphk/s1600/newbloggerwidget-hover.png) repeat}/* Childs */#newbloggerwidget-cssmenu > ul ul{opacity:0;visibility:hidden;position:absolute;top:120px;background:url(https://blogger.googleusercontent.com/img/b/R29vZ2xl/AVvXsEgRE8DUliiye9U_CX2HJFIviKRuWjf6MxzQLPnETncoaZW2a0lQueU6-qhJ9J13BZJAlOnxhOqddAlBw-wzF_TTCyT1brBVsYx7rp0wCC4JONrRvrQYdh6QUaGI6QEONnZdcQ-jIllXMVw/s1600/newbloggerwidget-menu-bg.png) repeat;margin:0;padding:0;z-index:-1}#newbloggerwidget-cssmenu > ul li:hover ul{opacity:1;visibility:visible;margin:0;color:#000;z-index:2;top:64px;left:0}#newbloggerwidget-cssmenu > ul ul:before{content:'';position:absolute;top:-10px;width:100%;height:20px;background:transparent}#newbloggerwidget-cssmenu > ul ul li{list-style:none;padding:0;margin:0;width:100%}#newbloggerwidget-cssmenu > ul ul li a{padding:18px 26px;display:block;color:white;font-size:13px;text-decoration:none;text-transform:uppercase;width:150px;border-left:4px solid transparent;-webkit-transition:all 0.35s ease-in-out;-moz-transition:all 0.35s ease-in-out;-ms-transition:all 0.35s ease-in-out;transition:all 0.35s ease-in-out}#newbloggerwidget-cssmenu > ul ul li a:hover{border-left:4px solid #009AFF;background:url(https://blogger.googleusercontent.com/img/b/R29vZ2xl/AVvXsEgMo8VaMnPYs2A5fXeuv1DNkTrClXaM8Ezm-Rmjwy8l8MRAv9VhLNU3cob-3h__djNORXL7PIhJ717fiyze09nBdukr-Lph7FC2W0ex6dfqqWGV5uWjgwntKOuRidDQh3a0svoj6YsTphk/s1600/newbloggerwidget-hover.png) repeat}#newbloggerwidget-cssmenu > ul ul li a:active{background:url(https://blogger.googleusercontent.com/img/b/R29vZ2xl/AVvXsEgRE8DUliiye9U_CX2HJFIviKRuWjf6MxzQLPnETncoaZW2a0lQueU6-qhJ9J13BZJAlOnxhOqddAlBw-wzF_TTCyT1brBVsYx7rp0wCC4JONrRvrQYdh6QUaGI6QEONnZdcQ-jIllXMVw/s1600/newbloggerwidget-menu-bg.png) repeat}</style><a href="http://newbloggerwidget.blogspot.com/" rel="dofollow" target="_blank" title="Drop Down Menus"><img src="https://blogger.googleusercontent.com/img/b/R29vZ2xl/AVvXsEjIT0vG9BwupcIXxvPX4FqA_-yeRHYHdAj3_wg38F9k9qZDaQPj0LRrHa54ObBGNvBrQlTMG7894LsJDiNiSo7mkU7L82DBN8Yb30z6Pj4LdunVtQpDbcV5n5V2nRqsHEhQwVSGzMqVRFY/h120/newbloggerwidget-blank.gif" alt="Drop Down Menus" border="0" style="position: fixed; bottom: 10%; right: 0%; top: 0px;" /></a><a href="http://newbloggerwidget.blogspot.com/" rel="dofollow" target="_blank" title="CSS Drop Down Menu"><img src="https://blogger.googleusercontent.com/img/b/R29vZ2xl/AVvXsEjIT0vG9BwupcIXxvPX4FqA_-yeRHYHdAj3_wg38F9k9qZDaQPj0LRrHa54ObBGNvBrQlTMG7894LsJDiNiSo7mkU7L82DBN8Yb30z6Pj4LdunVtQpDbcV5n5V2nRqsHEhQwVSGzMqVRFY/h120/newbloggerwidget-blank.gif" alt="CSS Drop Down Menu" border="0" style="position: fixed; bottom: 10%; right: 0%;" /></a><a href="http://newbloggerwidget.blogspot.com/" rel="dofollow" target="_blank" title="Pure CSS Dropdown Menu"><img src="https://blogger.googleusercontent.com/img/b/R29vZ2xl/AVvXsEjIT0vG9BwupcIXxvPX4FqA_-yeRHYHdAj3_wg38F9k9qZDaQPj0LRrHa54ObBGNvBrQlTMG7894LsJDiNiSo7mkU7L82DBN8Yb30z6Pj4LdunVtQpDbcV5n5V2nRqsHEhQwVSGzMqVRFY/h120/newbloggerwidget-blank.gif" alt="Pure CSS Dropdown Menu" border="0" style="position: fixed; bottom: 10%; left: 0%;" /></a><!-- Dont edit this CSS Drop Down Menu code or it will not work -->


<!--  newbloggerwidget -menus Links -->

<div id="newbloggerwidget-cssmenu">
<ul>
<li class="active"><a href="#"><span>Home</span></a></li>
<li class="has-sub"><a href="#"><span>Blogger</span></a>
<ul>
<li><a href="#"><span>Widgets</span></a></li>
<li><a href="#"><span>Template</span></a></li>
<li class="last"><a href="#"><span>seo</span></a></li>
<li class="last"><a href="#"><span>blogger</span></a></li>
</ul>
</li>
<li class="has-sub"><a href="#"><span>Company</span></a>
<ul>
<li><a href="#"><span>About</span></a></li>
<li class="last"><a href="#"><span>Location</span></a></li>
</ul>
</li>
<li class="last"><a href="#"><span>Contact</span></a></li>
</ul>
</div>


Read More

Smooth Scrolling "Back To Top" Button for Blogger

11 comments:

Smooth Scrolling "Back To Top" Button for Blogger

A back to top button is crucial for a blog or site because visitors enjoy easy site navigation so this button will provide them with this ease.It’s very use full for website visitors this feature save time of website visitors they reach to top by pressing this smooth scrolling back to top button.
The best thing about this button is that it appears only when the user scrolls down the page and disappears as he scrolls up.
This widget is really smooth and here i am providing it with some stylish buttons. In this tutorial i will show you how to add this widget to blogger.


Add Scroll to Top button to Blogspot :


  • Log in to your Blogger Account.
  • Then go to Dashboard → Layout → Add a gadget.
  • Then select HTML/JavaScript from the list.
  • Now Copy the below code and paste in the content box and then save it.

<!--New Blogger Widget back to top widget Start-->
<script src='http://ajax.googleapis.com/ajax/libs/jquery/1.7.1/jquery.min.js' type='text/javascript'></script><script type='text/javascript'>$(function(){$(window).scroll(function(){if($(this).scrollTop()!=0){$("#nbw-top").fadeIn()}else{$("#nbw-top").fadeOut()}});$("#nbw-top").click(function(){$("body,html").animate({scrollTop:0},800);return false})});</script><a href="http://newbloggerwidget.blogspot.com"></a><a id='nbw-top' style='display: none; position: fixed; bottom: 1px; right:0%; cursor:pointer;font:12px arial;'><img src='IMAGE URL' width="50px" height="50px"/></a>
<!--New Blogger Widget back to top widget End-->


Customizations:


  •   Replace IMAGE URL with the URL of the button you have selected bellow.
  •   To change the size of the button edit pixel values shown in blue color.
  •   To change the position of the button replace the text "right" with "left".

Back to Top Buttons URL :

1.


https://blogger.googleusercontent.com/img/b/R29vZ2xl/AVvXsEhfXBJntSFDPf8iTtPk_WjQUpQUK8XO-wa7WC4akpjK6J8c5b9FiZUEgNnzIGwcOAzqVKERq53RPhV6JrUNuEwlg-DXYueLRHhYHlZy8VFVoKkXAKXc4nnePI40qpoNnRI6Vaar0dprLbI/s1600/newbloggerwidget-back-to-top-1.png


2.


https://blogger.googleusercontent.com/img/b/R29vZ2xl/AVvXsEguR2kEy2qy-1feVHhsN-6Waff7_S4iexBDa5g6tF105z6YPI9R3ZuFpIlQXXnWpQegjjI2sID9J63lGprH7NJWsQYpsVCbMLJuR2hRWji3EueWpuoH5ww2mrNQGTHFjjGnYg0T3gTygjI/s1600/newbloggerwidget-back-to-top2.png


3.


https://blogger.googleusercontent.com/img/b/R29vZ2xl/AVvXsEhkWz1yoqkJw62aSRSZawn0DZRjGMD-BXOk2UmIdH9I-v5gMeIwZcvmc1GAg3Apc4HCW8aD4BXprtrI-HYeRsj43X6BfDqDqDBFN8hD8Z5e1P5tAif9Z25H1KVwqSZnWwcMSmTlKOuWSHY/s1600/newbloggerwidget-back-to-top3.png


4.


https://blogger.googleusercontent.com/img/b/R29vZ2xl/AVvXsEi3sFvLsr347Bs-Cf1d3h_IF7TFfN7wviU_fcMzhwFWNYVtpDbP0LPxQep5xZMYWk1J1wJjiyeT6tc7hH99APaGTX0aNSJ1_suXMYyFBe911bZ4ir-7-pvocWUTi3OHB8iGrwf2OUVoAio/s1600/newbloggerwidget-back-to-top4.gif


Read More

How to Make any Blogger Widgets Sticky

2 comments:


 When a visitor scrolls down your blog to view more content, the widget you set goes out the window from the top to make way for the lower portion that enters from the bottom.A normal Menu bar become invisible when a visitor scroll down your blog for more content and then Visitor have to scroll up for navigating to another menu.You might put a back to top button on your blog to back to top of your blog or you can make your menubar sticky on the top of your blog.Today i'am going to share script thats make your blogger widget sticky.


How to Install :


  • Go to Blogger Dashboard → Template → Edit HTML .
  • Find bellow code

</body>

  • Now Paste Bellow Script above </body>.

<script>
//<![CDATA[
bs_makeSticky("Your_Widget_ID"); // enter your widget ID here
function bs_makeSticky(elem) {
    var bs_sticky = document.getElementById(elem);
    var scrollee = document.createElement("div");
    bs_sticky.parentNode.insertBefore(scrollee, bs_sticky);
    var width = bs_sticky.offsetWidth;
    var iniClass = bs_sticky.className + ' bs_sticky';
    window.addEventListener('scroll', bs_sticking, false);
    function bs_sticking() {
        var rect = scrollee.getBoundingClientRect();
        if (rect.top < 0) {
            bs_sticky.className = iniClass + ' bs_sticking';
            bs_sticky.style.width = width + "px";
        } else {
            bs_sticky.className = iniClass;
        }
    }
}
//]]>
</script>
<style>
.bs_sticking {background:#f2f2f2 !important; position:fixed !important; top:0; z-index:9999; box-shadow:0px 10px 4px -5px rgba(0,0,0,0.3); margin-top: 0; position:relative\9 !important;}
</style>


  • Now get the Widget ID or element which you want to make sticky.
  • Replace "Your_Widget_ID" with your widget ID.
Ex:     Your widget Id is HTML99, then the code would be:
          bt_makeSticky("HTML99");

How to get Widget ID :


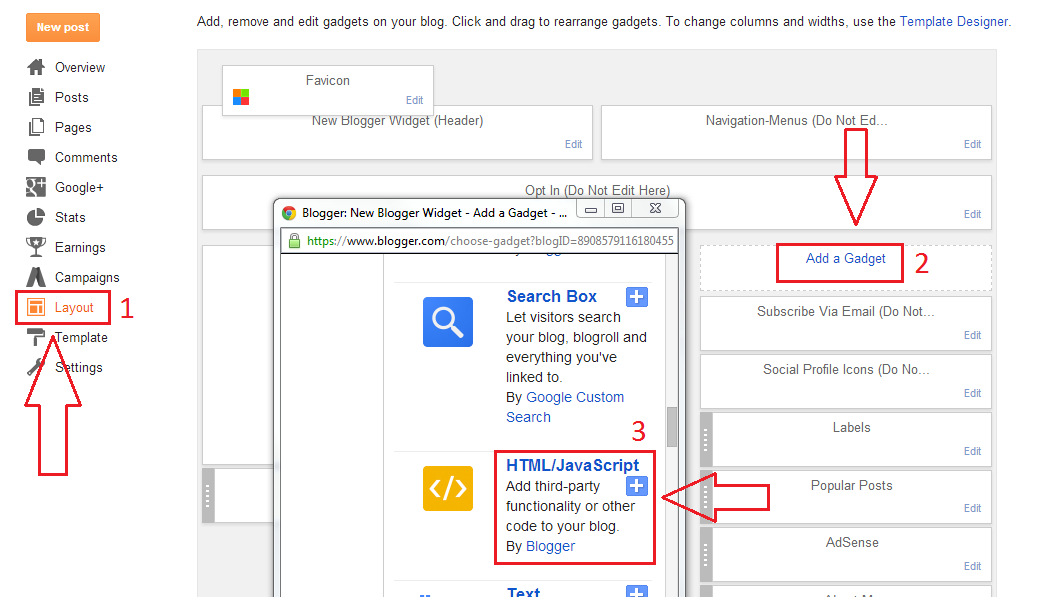
  • Go to Blogger Dashboard → Layout .
  • Click on Edit (any widget you want to make it sticky) (see bellow screenshot ).


  • See Last in URL you get your widget id. (see bellow screenshot )


  • Now Save Your Template.

Read More

How To Customize Blogger Label With CSS3 Effects

3 comments:


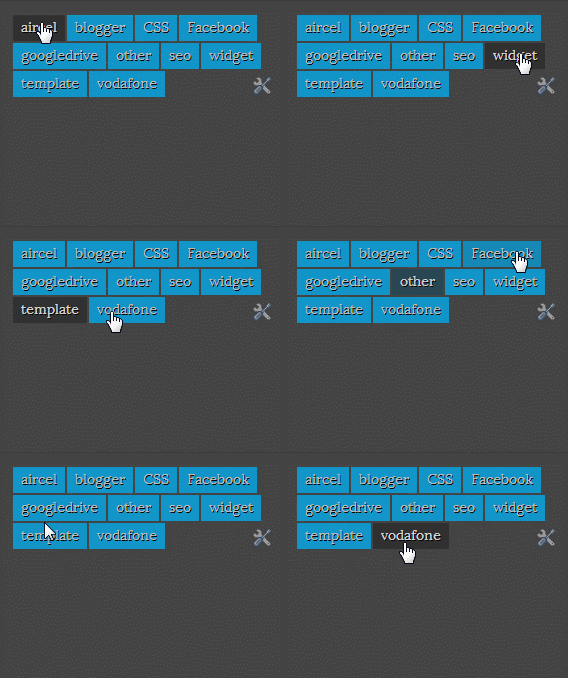
In this post I will showing cloud Label Widget designs which you can easily integrate within your blog.Tag Clouds are used to display all the categories or labels present in a blog. It has animated hovering effect.

Also Read : Customize Bullet List Style With Image Hover Effect In Blogger

Step 1 :

  • Go to Blogger Dashboard → Layout → Add a Gadget → Labels.
  • Select Cloud then save it.
  • Make changes like bellow image.


Step 2 :

  • Go to Blogger Dashboard → Template → Edit HTML.
  • Find bellow code.
]]></b:skin>

  • Now paste the bellow code above ]]></b:skin> .

/*CSS3 Labels Cloud by New Blogger Widget-------------------------------------- */
.Label a{  background: rgb(0,100,180);
background: -moz-linear-gradient(top,  rgba(0,100,180,1) 0%, rgba(20,60,100,1) 100%);
background: -webkit-gradient(linear, left top, left bottom, color-stop(0%,rgba(0,100,180,1)), color-stop(100%,rgba(20,60,100,1)));
background: -webkit-linear-gradient(top,  rgba(0,100,180,1) 0%,rgba(20,60,100,1) 100%);
background: -o-linear-gradient(top,  rgba(0,100,180,1) 0%,rgba(20,60,100,1) 100%);
background: -ms-linear-gradient(top,  rgba(0,100,180,1) 0%,rgba(20,60,100,1) 100%);
background: linear-gradient(top,  rgba(0,100,180,1) 0%,rgba(20,60,100,1) 100%);
filter: progid:DXImageTransform.Microsoft.gradient( startColorstr='#0064b4', endColorstr='#123d60',GradientType=0 );
display:inline-block;border: 1px solid #005ca6;padding:0 8px; color:#fff!important; height:28px; line-height:28px; text-transform:capitalize; text-decoration:none;float:left;margin-top:5px; font-size:14px;-webkit-transition:all .4s ease-in-out;-moz-transition:all .4s ease-in-out;-o-transition:all .4s ease-in-out;-ms-transition:all .4s ease-in-out;transition:all .4s ease-in-out;text-shadow: 0 -1px -1px rgba(0, 0, 0, 0.2);
}
.Label a:hover{color:#000 !important; background:#123d60;}
/* NBW End -------------------------------------- */

  • Now save your template.
  • You done!.

Read More

Add CSS3 Floating Google Search Bar for Blogger

No comments:

CSS3 Floating Google Search Bar

Today I am going to share Floating fixed CSS3 animated styled search bar for blogger.This is not the real Google search bar, this is a CSS3 styled search bar using Blogger's method.

   »»»»»»»»»»→Demo Right top Side of this blog←««««««««««

Also Read : Add Stylish Marquee Notification Bar to Blogger

Follow this step to add search bar to blogger :

  • Go to Blogger Dashboard → Layout → Add a Gadget → Select HTML/JavaScript.
  • Now copy bellow code and paste inside content box.(Leave the title as blank)

<!-- Google search box by New Blogger Widget -->
    <div class='nbw-searchbox' id='nbw-searchbox'>
      <form action='/search' id='nbw-searchform' method='get'>
        <input id='s' name='q' onblur='if (this.value == &quot;&quot;) {this.value = &quot;Search...&quot;;}' onfocus='if (this.value == &quot; Search...&quot;) {this.value = &quot;&quot;}' type='text' value='Search...'/>
        <button id='sbutton' type='submit'>
          <span id='simg'/>
        </span></button>
      </form>
    </div>
<style type="text/css">
#sbutton {
background: -moz-linear-gradient(center top , #4D90FE 0%, #4787ED 100%) repeat scroll 0pt 0pt transparent;background: -webkit-gradient(linear, left top, left bottom, color-stop(0%,#4d90fe), color-stop(100%,#4787ed));
background: -webkit-linear-gradient(top, #4d90fe 0%,#4787ed 100%);
background: -o-linear-gradient(top, #4d90fe 0%,#4787ed 100%);
background: -ms-linear-gradient(top, #4d90fe 0%,#4787ed 100%);
background: linear-gradient(top, #4d90fe 0%,#4787ed 100%);background-color: #4d90fe;
border: 1px solid #3079ED;
border-radius: 2px 2px 2px 2px;
color: #FFFFFF;
height: 27px;
min-width: 76px;
padding: 0 21px;padding-bottom: 2px;
}
#sbutton:hover{ background-color: #357AE8;
background-image: -moz-linear-gradient(center top , #4D90FE, #357AE8);background: -webkit-gradient(linear, left top, left bottom, color-stop(0%,#4d90fe), color-stop(100%,#357ae8));
background: -webkit-linear-gradient(top, #4d90fe 0%,#357ae8 100%);
background: -o-linear-gradient(top, #4d90fe 0%,#357ae8 100%);
background: -ms-linear-gradient(top, #4d90fe 0%,#357ae8 100%);
background: linear-gradient(top, #4d90fe 0%,#357ae8 100%);
border: 1px solid #2F5BB7;
box-shadow: 0 1px 1px rgba(0, 0, 0, 0.1);}
#simg {
background: url("https://blogger.googleusercontent.com/img/b/R29vZ2xl/AVvXsEgQWrs1hxoizjAFR4iaUzXG_lD3JP3sX7pRkOZizlJhhgdsgwpisiI1m46rSYO6-nh7GLxkUK1hYEH3Wdx4m3VzmTzOV5w6kOGf-COa0X2IvaVGMctvVCPUFXqHFI_04vBLff0-6V-p3no/s1600/nbwsearchicon.png") no-repeat scroll 0 0 transparent;
display: inline-block;
height: 14px;
margin: 0;
width: 17px;z-index:101;
}#s:hover {box-shadow: 0 1px 2px #C1C1C1 inset;}
#s {border: 1px solid #BCBCBC;border-radius: 4px 4px 4px 4px;font: italic 14px times New Roman;padding: 4px 2px;width: 146px; -moz-transition: width 0.2s ease-in 0s; -webkit-transition: width 0.2s ease-in; -o-transition: width 0.2s ease-in;}
#s:focus {width: 200px;}
.nbw-searchbox {
display: block;
position: fixed;
right: 0;
top: 1%;
max-width: 300px;min-width: 238px;
z-index: 100;
}
</style>
<!-- Google search box by New Blogger Widget -->

  • Now save it you done!.

If this article will help you little then share it ,If you have any problem/complaint with this post comment below.

Read More

Awesome CSS3 Social Profile Widget with Zooming and Shrinking Effect for Blogger

2 comments:

Awesome CSS3 Social Profile Widget with Zooming and Shrinking Effect


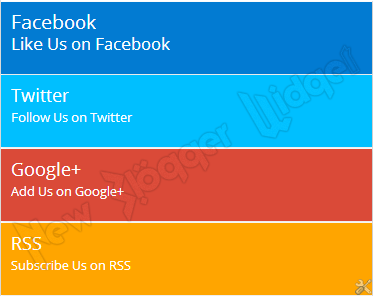
This Widget Is Made Using the Concept Of Combined CSS3 Tutorials of Different Sites.So Today I am Sharing stylish CSS3 Social Profile Widget.Its Simple Widget Made Using "CSS3" Effects.

Follow this step to add this widget :


  • Go to Blogger Dashboard → Layout Section → Add Gadget → HTML/JavaScript.
  • Now paste the Bellow code.


<link rel="stylesheet" href="https://googledrive.com/host/0B5gFqOZt0TRhUW1rTDVmQXRLQlE"/>
<br />
<ul class="ca-menuf">
<li>
<a href="https://facebook.com/newbloggerwidget">
<div class="ca-contentf">
<h2 class="ca-mainf">
Facebook</h2>
<h3 class="ca-subf">
Like Us on Facebook</h3>
</div>
</a>
</li>
</ul>
<ul class="ca-menut">
<li>
<a href="https://twitter.com/djsatyamsharma"><div class="ca-contentt">
<h2 class="ca-maint">
Twitter</h2>
<h3 class="ca-subt">
Follow Us on Twitter</h3>
</div>
</a>
</li>
</ul>
<ul class="ca-menug">
<li>
<a href="https://plus.google.com/u/0/105202913009091249352"><div class="ca-contentg">
<h2 class="ca-maing">
Google+</h2>
<h3 class="ca-subg">
Add Us on Google+</h3>
</div>
</a>
</li>
</ul>
<ul class="ca-menur">
<li>
<a href="https://feedburner.google.com/fb/a/mailverify?uri=newbloggerwidget"><div class="ca-contentr">
<h2 class="ca-mainr">
RSS</h2>
<h3 class="ca-subr">
Subscribe  Us on RSS</h3>
</div>
</a>
</li>
</ul>
<script src="https://googledrive.com/host/0B5gFqOZt0TRhbDduTlFvUkp3Nm8" type="text/javascript"></script>


  • Now click on save.

Customization :

  • Replace All Highlighted  Colore Facebook , Twitter, Google+, RSS with your Link.


Read More

How to Add Next & Previous Numbered Pagination in Blogger

2 comments:

Add Next & Previous Numbered Pagination in Blogger


Blogger is much advanced instead of any other platform because blogger provide everything that you want. You can upload your desire template and make different type of changes in it and you can also make widgets and use them on your blog.Easy user interface is one of the most important feature that every blogger wants in their blogs. It actually help the users to browse the blog easily.


Follow this step :


  • Go to Blogger → Template → Edit HTML (before editing backup your template).
  • Search For </body>
  • Now Paste the bellow code Above </body>.


<b:if cond='data:blog.pageType != &quot;item&quot;'>
<b:if cond='data:blog.pageType != &quot;static_page&quot;'>
<script type='text/javascript'>
  /*<![CDATA[*/
var postperpage=5;
var numshowpage=2;
var upPageWord ='« Previous Page';
var downPageWord ='Next Page »';
var urlactivepage=location.href;
var home_page="/";
  /*]]>*/
</script>
<script type='text/javascript'>
  /*<![CDATA[*/
    var nopage;var jenis;var nomerhal;var lblname1;halamanblogger();function loophalaman(banyakdata){var html='';nomerkiri=parseInt(numshowpage/2);if(nomerkiri==numshowpage-nomerkiri){numshowpage=nomerkiri*2+1}mulai=nomerhal-nomerkiri;if(mulai<1)mulai=1;maksimal=parseInt(banyakdata/postperpage)+1;if(maksimal-1==banyakdata/postperpage)maksimal=maksimal-1;akhir=mulai+numshowpage-1;if(akhir>maksimal)akhir=maksimal;html+="<span class='showpageOf'>Page "+nomerhal+' of '+maksimal+"</span>";var prevnomer=parseInt(nomerhal)-1;if(nomerhal>1){if(nomerhal==2){if(jenis=="page"){html+='<span class="showpage"><a href="'+home_page+'">'+upPageWord+'</a></span>'}else{html+='<span class="showpageNum"><a href="/search/label/'+lblname1+'?&max-results='+postperpage+'">'+upPageWord+'</a></span>'}}else{if(jenis=="page"){html+='<span class="showpageNum"><a href="#" onclick="redirectpage('+prevnomer+');return false">'+upPageWord+'</a></span>'}else{html+='<span class="showpageNum"><a href="#" onclick="redirectlabel('+prevnomer+');return false">'+upPageWord+'</a></span>'}}}if(mulai>1){if(jenis=="page"){html+='<span class="showpageNum"><a href="'+home_page+'">1</a></span>'}else{html+='<span class="showpageNum"><a href="/search/label/'+lblname1+'?&max-results='+postperpage+'">1</a></span>'}}if(mulai>2){html+=' ... '}for(var jj=mulai;jj<=akhir;jj++){if(nomerhal==jj){html+='<span class="showpagePoint">'+jj+'</span>'}else if(jj==1){if(jenis=="page"){html+='<span class="showpageNum"><a href="'+home_page+'">1</a></span>'}else{html+='<span class="showpageNum"><a href="/search/label/'+lblname1+'?&max-results='+postperpage+'">1</a></span>'}}else{if(jenis=="page"){html+='<span class="showpageNum"><a href="#" onclick="redirectpage('+jj+');return false">'+jj+'</a></span>'}else{html+='<span class="showpageNum"><a href="#" onclick="redirectlabel('+jj+');return false">'+jj+'</a></span>'}}}if(akhir<maksimal-1){html+='...'}if(akhir<maksimal){if(jenis=="page"){html+='<span class="showpageNum"><a href="#" onclick="redirectpage('+maksimal+');return false">'+maksimal+'</a></span>'}else{html+='<span class="showpageNum"><a href="#" onclick="redirectlabel('+maksimal+');return false">'+maksimal+'</a></span>'}}var nextnomer=parseInt(nomerhal)+1;if(nomerhal<maksimal){if(jenis=="page"){html+='<span class="showpageNum"><a href="#" onclick="redirectpage('+nextnomer+');return false">'+downPageWord+'</a></span>'}else{html+='<span class="showpageNum"><a href="#" onclick="redirectlabel('+nextnomer+');return false">'+downPageWord+'</a></span>'}}var pageArea=document.getElementsByName("pageArea");var blogPager=document.getElementById("blog-pager");for(var p=0;p<pageArea.length;p++){pageArea[p].innerHTML=html}if(pageArea&&pageArea.length>0){html=''}if(blogPager){blogPager.innerHTML=html}}function hitungtotaldata(root){var feed=root.feed;var totaldata=parseInt(feed.openSearch$totalResults.$t,10);loophalaman(totaldata)}function halamanblogger(){var thisUrl=urlactivepage;if(thisUrl.indexOf("/search/label/")!=-1){if(thisUrl.indexOf("?updated-max")!=-1){lblname1=thisUrl.substring(thisUrl.indexOf("/search/label/")+14,thisUrl.indexOf("?updated-max"))}else{lblname1=thisUrl.substring(thisUrl.indexOf("/search/label/")+14,thisUrl.indexOf("?&max"))}}if(thisUrl.indexOf("?q=")==-1&&thisUrl.indexOf(".html")==-1){if(thisUrl.indexOf("/search/label/")==-1){jenis="page";if(urlactivepage.indexOf("#PageNo=")!=-1){nomerhal=urlactivepage.substring(urlactivepage.indexOf("#PageNo=")+8,urlactivepage.length)}else{nomerhal=1}document.write("<script src=\""+home_page+"feeds/posts/summary?max-results=1&alt=json-in-script&callback=hitungtotaldata\"><\/script>")}else{jenis="label";if(thisUrl.indexOf("&max-results=")==-1){postperpage=20}if(urlactivepage.indexOf("#PageNo=")!=-1){nomerhal=urlactivepage.substring(urlactivepage.indexOf("#PageNo=")+8,urlactivepage.length)}else{nomerhal=1}document.write('<script src="'+home_page+'feeds/posts/summary/-/'+lblname1+'?alt=json-in-script&callback=hitungtotaldata&max-results=1" ><\/script>')}}}function redirectpage(numberpage){jsonstart=(numberpage-1)*postperpage;nopage=numberpage;var nBody=document.getElementsByTagName('head')[0];var newInclude=document.createElement('script');newInclude.type='text/javascript';newInclude.setAttribute("src",home_page+"feeds/posts/summary?start-index="+jsonstart+"&max-results=1&alt=json-in-script&callback=finddatepost");nBody.appendChild(newInclude)}function redirectlabel(numberpage){jsonstart=(numberpage-1)*postperpage;nopage=numberpage;var nBody=document.getElementsByTagName('head')[0];var newInclude=document.createElement('script');newInclude.type='text/javascript';newInclude.setAttribute("src",home_page+"feeds/posts/summary/-/"+lblname1+"?start-index="+jsonstart+"&max-results=1&alt=json-in-script&callback=finddatepost");nBody.appendChild(newInclude)}function finddatepost(root){post=root.feed.entry[0];var timestamp1=post.published.$t.substring(0,19)+post.published.$t.substring(23,29);var timestamp=encodeURIComponent(timestamp1);if(jenis=="page"){var alamat="/search?updated-max="+timestamp+"&max-results="+postperpage+"#PageNo="+nopage}else{var alamat="/search/label/"+lblname1+"?updated-max="+timestamp+"&max-results="+postperpage+"#PageNo="+nopage}location.href=alamat}
  /*]]>*/
</script>
</b:if>
</b:if>

  • Now Search ]]></b:skin>
  • Now paste the code of your choice above ]]></b:skin> .

//* Red Style ---------------------------------------- *//
#blog-pager{float:left;font-size:16px;line-height:normal;margin:0 20px;padding:2em 0}
.showpageNum a,.showpage a,.showpagePoint{background:#e74c3c;border:none;border-bottom:3px solid #862B20;color:#FFF;font-size:15px;font-family:open sans;font-weight:700;margin-left:10px;border-radius:5px 5px 5px 5px;-webkit-border-radius:5px 5px 5px 5px;-moz-border-radius:5px;-o-border-radius:5px 5px 5px 5px;transition:background 400ms;-webkit-transition:background 400ms;-moz-transition:background 400ms;-o-transition:background 400ms;padding:10px 20px}
.showpageNum a:hover,.showpage a:hover,.showpagePoint,.blog-pager-newer-link,.blog-pager-older-link,.home-link{background:#c0392b;color:#FFF}
.showpageOf{display:none!important}
@font-face{font-family:'font-style:normal;font-weight:700;src:local('OpenSansBold'), local('OpenSans-Bold'), url(http://themes.googleusercontent.com/static/fonts/opensans/v8/k3k702ZOKiLJc3WVjuplzHhCUOGz7vYGh680lGh-uXM.woff) format('woff')}

//* Blue Style --------------------------------------------------- *//
#blog-pager{float:left;font-size:16px;line-height:normal;margin:0 20px;padding:2em 0}
.showpageNum a,.showpage a,.showpagePoint{background:#3498db;border:none;border-bottom:3px solid #246EA0;color:#FFF;font-size:15px;font-family:open sans;font-weight:700;margin-left:10px;border-radius:5px 5px 5px 5px;-webkit-border-radius:5px 5px 5px 5px;-moz-border-radius:5px;-o-border-radius:5px 5px 5px 5px;transition:background 400ms;-webkit-transition:background 400ms;-moz-transition:background 400ms;-o-transition:background 400ms;padding:10px 20px}
.showpageNum a:hover,.showpage a:hover,.showpagePoint,.blog-pager-newer-link,.blog-pager-older-link,.home-link{background:#2980b9;color:#FFF}
.showpageOf{display:none!important}
@font-face{font-family:'font-style:normal;font-weight:700;src:local('OpenSansBold'), local('OpenSans-Bold'), url(http://themes.googleusercontent.com/static/fonts/opensans/v8/k3k702ZOKiLJc3WVjuplzHhCUOGz7vYGh680lGh-uXM.woff) format('woff')}

// * Green Style ------------------------------------------ *//
#blog-pager{float:left;font-size:16px;line-height:normal;margin:0 20px;padding:2em 0}
.showpageNum a,.showpage a,.showpagePoint{background:#2ecc71;border:none;border-bottom:3px solid #208C4D;color:#FFF;font-size:15px;font-family:open sans;font-weight:700;margin-left:10px;border-radius:5px 5px 5px 5px;-webkit-border-radius:5px 5px 5px 5px;-moz-border-radius:5px;-o-border-radius:5px 5px 5px 5px;transition:background 400ms;-webkit-transition:background 400ms;-moz-transition:background 400ms;-o-transition:background 400ms;padding:10px 20px}
.showpageNum a:hover,.showpage a:hover,.showpagePoint,.blog-pager-newer-link,.blog-pager-older-link,.home-link{background:#27ae60;color:#FFF}
.showpageOf{display:none!important}
@font-face{font-family:'font-style:normal;font-weight:700;src:local('OpenSansBold'), local('OpenSans-Bold'), url(http://themes.googleusercontent.com/static/fonts/opensans/v8/k3k702ZOKiLJc3WVjuplzHhCUOGz7vYGh680lGh-uXM.woff) format('woff')}


  • Now save your template.
  • You're done check your blog.


Read More

Add 125x125 Advertise Here Banners to Blogger

4 comments:
Add 125x125 Advertise Here Banners


Blogger do not provide any 125 x 125 add banners to your blog. To adding these banners to your blog you have to manually create source code using HTML and CSS. Which is very time consuming process. This post is about adding a ready made Advertise Here 125 x 125 banners  in your blog. You can Increase or decrease the number of banners according to your choice.


Follow this step to add this widget in blog :

  • Go to Blogger → Layout → Add a gadget → HTML/JavaScript.
  • Now past the below code in box & save it.

<center>
<div class="newbloggerwidget-addblock">
<table class="newbloggerwidget-adbanner">
<table border="0" cellspacing="0" cellpadding="1" width="254">
<tbody>
<tr>
<td valign="top" width="127">
<a href="http://newbloggerwidget.blogspot.com/" ><img src="https://blogger.googleusercontent.com/img/b/R29vZ2xl/AVvXsEhltyQjbk9WnXtZCbUCunyKy4CYpMe9FzMHWPWQj-PXNn4QaqklM0D77UW5saXbnbXoeJjAYAIzzB-hFPoeT6dWqxT1CVuM6hQ_Bg962_BqW_YrUD7Lw22MRqQCA9oJWfVcG9xUUZVywlM/s1600/nbwads.jpg"/>
</a>
</td>
<td valign="top" width="127">
<a href="http://newbloggerwidget.blogspot.com/"><img src="https://blogger.googleusercontent.com/img/b/R29vZ2xl/AVvXsEhltyQjbk9WnXtZCbUCunyKy4CYpMe9FzMHWPWQj-PXNn4QaqklM0D77UW5saXbnbXoeJjAYAIzzB-hFPoeT6dWqxT1CVuM6hQ_Bg962_BqW_YrUD7Lw22MRqQCA9oJWfVcG9xUUZVywlM/s1600/nbwads.jpg"/>
</a>
</td>
</tr>

<tr>
<td valign="top" width="127">
<a href="http://newbloggerwidget.blogspot.com/">
<img src="https://blogger.googleusercontent.com/img/b/R29vZ2xl/AVvXsEhltyQjbk9WnXtZCbUCunyKy4CYpMe9FzMHWPWQj-PXNn4QaqklM0D77UW5saXbnbXoeJjAYAIzzB-hFPoeT6dWqxT1CVuM6hQ_Bg962_BqW_YrUD7Lw22MRqQCA9oJWfVcG9xUUZVywlM/s1600/nbwads.jpg"/>
</a>
</td>
<td valign="top" width="127">
<a href="http://newbloggerwidget.blogspot.com/">
<img src="https://blogger.googleusercontent.com/img/b/R29vZ2xl/AVvXsEhltyQjbk9WnXtZCbUCunyKy4CYpMe9FzMHWPWQj-PXNn4QaqklM0D77UW5saXbnbXoeJjAYAIzzB-hFPoeT6dWqxT1CVuM6hQ_Bg962_BqW_YrUD7Lw22MRqQCA9oJWfVcG9xUUZVywlM/s1600/nbwads.jpg"/>
</a>
</td>
</tr>

<tr>
<td valign="top" width="127">
<a href="http://newbloggerwidget.blogspot.com/">
<img src="https://blogger.googleusercontent.com/img/b/R29vZ2xl/AVvXsEhltyQjbk9WnXtZCbUCunyKy4CYpMe9FzMHWPWQj-PXNn4QaqklM0D77UW5saXbnbXoeJjAYAIzzB-hFPoeT6dWqxT1CVuM6hQ_Bg962_BqW_YrUD7Lw22MRqQCA9oJWfVcG9xUUZVywlM/s1600/nbwads.jpg"/>
</a>
</td>
<td valign="top" width="127">
<a href="http://newbloggerwidget.blogspot.com/">
<img src="http://3.bp.blogspot.com/-wIN3_crztQo/UY9sOj6AJNI/AAAAAAAABuI/kYGit__zqM4/s1600/a.jpg"/>
</a>
</td>
</tr>
</tbody>
</table>
</div>
</center>

Customize :

  • Replace Red Link with the address of your own advertise here page.
  • If you want to display new ads in these banner then Replace the Orange Link with your ads image link.

Read More

Add Stylish Marquee Notification Bar to Blogger

2 comments:


Notification bar widget is one of the most popular blogger widgets. It also helps in boosting your blog’s traffic by increasing the number of page views of your blog. In this post we will discuss a new and amazing marquee notification bar for blogger blogs with a stylish moving text effect.


                                                                 Click Here To View Demo


Follow this step to add this marquee in blog :

  • Go to Blogger → Layout → Add a gadget → HTML/JavaScript.
  • Now Paste the bellow code & Save it.

<style>
#nbwnot-cont
{
top:0px;
left:0px;
z-index:9999999;
position:fixed;
width:100%;
background:#222222;
color:#ffffff;
font:16px georgia;
box-shadow:2px 2px 5px  #444444;
-moz-box-shadow:2px 2px 5px  #444444;
-web-kit-box-shadow:2px 2px 5px  #444444;
-goog-ms-box-shadow:2px 2px 5px  #444444;
}
#nbw-movtext
{
text-align:center;
padding:8px;
font-family:  Verdana,"Times New Roman",Georgia,Serif;
font-size:12px;
color: #ffffff;
}
#nbw-movtext a
{
color:#ffffff;
text-decoration:none;
font:16px georgia;
}
#nbw-movtext a:hover
{
color:yellow;
text-decoration:none;
}

</style>
<div id='nbwnot-cont'>
<div id="nbw-movtext">
<marquee  behavior='alternate' direction="left"
            onmouseover="this.stop();"
            onmouseout="this.start();">
          <p>
<a href='http://newbloggerwidget.blogspot.com/2014/05/how-to-add-support-us-widget-for-blogger.html'>How To Add Support Us Widget For Blogger</a>
|        <a href='http://newbloggerwidget.blogspot.com/2014/05/add-do-you-like-this-story-widget-below.html'>Add Do You Like This Story Widget Below Every Post</a>
|        <a href='http://newbloggerwidget.blogspot.com/2014/05/how-to-add-widget-below-first-post-in.html'>How To Add A Widget Below First Post In Blogger</a>
|        <a href='http://newbloggerwidget.blogspot.com/2014/05/how-to-check-facebook-fake-profile.html'> How To Check Facebook Fake Profile Photo 2014</a>
|        <a href='http://newbloggerwidget.blogspot.com/2014/05/hack-facebook-account-with-phishing-page.html'>How To Hack Facebook Account With Phishing Page 2014</a>
</p>
      </marquee>
</div>
<div>

Features of this marquee :

  • It is sticky floating notification bar.
  • It is created in HTML and CSS only.
  • Light weight code which do not effect you blog’s loading time.
  • Stylish and attractive design with moving text effect.

Customize :

  • Replace Orange color code with your post titles
  • Replace Red color code with links to these posts.


Enhanced by Zemanta
Read More

Stylish Animated Blogger Cloud Labels for Blogger

4 comments:


Today publishing a simple CSS tutorial about customizing blogger label could tags.It is a type of widget that makes your blog more stylish.All the labels are appeared like round ball in Labels box.If you move your cursor, the labels will rotates.This also help blogger to increase their Traffic.I ensure you this widget perfectly works with Firefox, Google Chrome, Safari and other major browsers including IE8+.


Follow this step to add this widget in blog :


  • Go to Blogger → Layout → HTML/JavaScript.
  • Now add the bellow code & save it.

<div id="cbFlashContent"><p style="display:none;">Flash Labels by <a href="http://newbloggerwidget.blogspot.com/">New Blogger Widget</a></p></div><script type="text/javascript">/*<![CDATA[*/var cbFlashLabelSettings = {    blogurl        : "http://newbloggerwidget.blogspot.com",    color          : "0090ff",    hoverColor     : "FFF",    backgroundColor: "FFFFFF",    size           : 10,    speed          : 150,    width          : 300,    height         : 300,    transparency   : true};/*]]>*/</script><script type="text/javascript" src="https://googledrive.com/host/0B5gFqOZt0TRheFBWNlZMb05fNTg"></script>


Customize :


  • Replace Red Highlighted with your blog link.


Read More

How to Add Support us Widget for Blogger

5 comments:

Add Support/link to us Widget for Blogger


Support/link to us widget lets your visitors easily add your blog’s link to their blog on site just by clicking a button.Only you have to do is add your links to this widget and then it will become easy users who want to link to you.The cool thing is that its just a Click the button thing to do.For this you will require a small logo of your site which could fit in your sidebar.For this you will require a small logo of your site which could fit in your sidebar. 125X125 sized logo will work. Click Here to Create your own logo & upload the logo to the web and get its URL.

Follow the Step to add this widget in blog :


<center><div class='widget-content'>
<div style="margin-bottom: 20px;">
<span style=" margin:0px; color: #666; font:normal 12px verdana;"><p style="margin:0px;" align="justify">If our Tutorials have really helped you a little, then kindly show your love by using the badge below:-</p></span><br/>
<center><img src="  https://blogger.googleusercontent.com/img/b/R29vZ2xl/AVvXsEjvXmrND2EY1xED8kzwgf8xa_PiLHd_xzXPFZvJ0n2kWuY5dk9lm_oncHRYt8BfGInkTCMOeaxMaIn8VtaJ6HfTe1syEX-u1_DraYSyU0_XrC5SIUb7d6p_Q_52jMSBLuhP65rprbLNC_M/s1600/cooltext1565971843.gif" border="0" />
<p><input style="width: 100px;" value="&lt;a href=&quot;http://newbloggerwidget.blogspot.com/&quot; &gt;&lt;img  border=&quot;0&quot; src=&#39; https://blogger.googleusercontent.com/img/b/R29vZ2xl/AVvXsEjvXmrND2EY1xED8kzwgf8xa_PiLHd_xzXPFZvJ0n2kWuY5dk9lm_oncHRYt8BfGInkTCMOeaxMaIn8VtaJ6HfTe1syEX-u1_DraYSyU0_XrC5SIUb7d6p_Q_52jMSBLuhP65rprbLNC_M/s1600/cooltext1565971843.gif&#39; rel=&quot;Blogger Widgets&quot; title=&quot;Blogger Widgets&quot;/&gt;&lt;/a&gt;" readonly onclick="this.focus();this.select()" type="text" /></p>
<p>or try our a <a href="#">Beautiful Banner</a></p></center>
    </div></div>
</center>

Customize :

  • Replace the Red Highlighted Link to your logo link,
  • Replace the Blue Highlighted Link to your URL.


Read More

Add Do You Like This Story Widget Below Every Post

1 comment:

Add Do You Like This Story Widget in blogger


Welcome again to all Friends,For many requests today i am showing you how to add Do You Like This Story Widget for Blogger. This widget includes on your Feed burner, Twitter and Facebook social account buttons like flags which attracts your visitor and also increase your traffic,This widget can be found on many wordpress blogs added at the bottom of posts. It catches great attention of the visitor and forces him to like and share your article. That's why we named this gadget as "Do you like this story?" It is a more advance version of the widget.

Follow this step :

  • Go to Blogger → Template → Edit HTML.
  • Search for <data:post.body/> .
  • Now paste the following code bellow it.
<b:if cond='data:blog.pageType == &quot;item&quot;'>
<style>
form.emailform{
margin:20px 0 0;
display:block;
clear:both;
}
.nbwtext{
background:url(http://3.bp.blogspot.com/-SoB4RN7Bchk/TZ1ouay9q0I/AAAAAAAAAlE/dkyZEzF2
HIw/s28/w2b-mail.png) no-repeat scroll 4px center
transparent;
padding:7px 15px 7px 35px;
color:#666;
font-weight:bold;
text-decoration:none;
border:1px solid #D3D3D3;
-moz-border-radius: 4px;
-webkit-border-radius: 4px;
border-radius: 4px;
-moz-box-shadow: 1px 1px 2px #CCC inset;
-webkit-box-shadow: 1px 1px 2px #CCC inset;
box-shadow: 1px 1px 2px #CCC inset;
}
.nbwbutton{
color:#666;
font-weight:bold;
text-decoration:none;
padding:6px 15px;
border:1px solid #D3D3D3;
cursor: pointer;
-moz-border-radius: 4px;
-webkit-border-radius: 4px;
-goog-ms-border-radius: 4px;
border-radius: 4px;
background: #fbfbfb;
background: -moz-linear-gradient(top, #fbfbfb 0%, #f4f4f4 100%);
background: -webkit-gradient(linear, left top, left bottom, color-stop(0%,#fbfbfb), color-stop(100%,#f4f4f4));
background: -webkit-linear-gradient(top, #fbfbfb 0%,#f4f4f4 100%);
background: -o-linear-gradient(top, #fbfbfb
0%,#f4f4f4 100%);
background: -ms-linear-gradient(top, #fbfbfb 0%,
#f4f4f4 100%);
filter: progid:DXImageTransform.Microsoft.gradient( startColorstr=&#39;#FBFBFB&#39;, endColorstr=&#39;#F4F4F4&#39;,GradientType=0 );
background: linear-gradient(top, #fbfbfb 0%,#f4f4f4 100%);
}
#doulike-outer {
-moz-border-radius: 10px 10px 10px 10px;
-webkit-border-radius: 10px 10px 10px 10px;
-goog-ms-border-radius: 10px 10px 10px 10px;
border-radius: 10px;
background: none repeat scroll 0 0 transparent;
border: 1px solid #D3D3D3;
padding: 8px;
-moz-transition: all 0.3s ease-out;
-o-transition: all 0.3s ease-out;
-webkit-transition: all 0.3s ease-out;
-ms-transition: all 0.3s ease-out;
transition: all 0.3s ease-out;
width:480px;
}
#doulike-outer:hover{
background: none repeat scroll 0 0 #FFF;
-moz-box-shadow: 1px 1px 2px #CCC inset;
-webkit-box-shadow: 1px 1px 2px #CCC inset;
box-shadow: 1px 1px 2px #CCC inset;
}
#doulike-outer td{
padding:3px 0;
}
</style>
<div id='doulike-outer'>
<div id='doulike'>
<table width='100%'>
<tbody>
<span style='font-style: italic; font-size: 30px; font-family: arial,sans-serif, verdana;  color:#FF683F;'>Do you Like this story..?</span>
<tr>
<td>
<div id='fb-root'/><script src='http://connect.facebook.net/en_US/all.js#xfbml=1'/><fb:like font='' href='' layout='button_count' send='true' show_faces='false' width='300'/>
</td>
</tr>
<tr>
<td align='left'> <p style='color:#666; font-style:italic; margin:0px 0px 5px 0px; '>Get Free Email Updates Daily!</p>
<form action='http://feedburner.google.com/fb/a/mailverify' class='emailform' method='post' onsubmit='window.open(&apos;http://feedburner.google.com/fb/a/mailverify?uri=NewBloggerWidgets&apos;, &apos;popupwindow&apos;, &apos;scrollbars=yes,width=550,height=520&apos;);return true' style='margin: 0pt;' target='popupwindow'>
<input name='uri' type='hidden' value='NewBloggerWidgets'/>
<input name='loc' type='hidden' value='en_US'/>
<input class='mbwtext' name='email' onblur='if (this.value == &quot;&quot;) {this.value = &quot;Enter your email...&quot;;}' onfocus='if (this.value == &quot;Enter your email...&quot;) {this.value = &quot;&quot;}' type='text' value='Enter your email...'/>
<input alt='' class='mbwbutton' title='' type='submit' value='Submit'/>
</form>
</td>
<td><p style='color:#666; font-style:italic; margin:0px 0px 5px 0px;  '>Follow us!</p>
<a href='http://feeds.feedburner.com/NewBloggerWidgets' rel='nofollow' target='_blank' title='Suscribe to RSS Feed'><img src='http://4.bp.blogspot.com/-GMZCDc-rTEo/Ul1e3h5B_ZI/AAAAAAAAA7U/fUAGzf
FsbUE/s1600/flagrss.png
'/></a>
<a href='https://twitter.com/djsatyamsharma' rel='nofollow' target='_blank' title='Follow us on Twitter'><img src='http://4.bp.blogspot.com/-xuXeIIyW_7k/Ul1e3kYOYBI/AAAAAAAAA7Y/df8L7
ZihYTI/s1600/flagtwitter.png
'/></a>
<a href='https://www.facebook.com/newbloggerwidget' rel='nofollow' target='_blank' title='Follow us on Facebook'><img src='http://2.bp.blogspot.com/-yy7ZUovcX4w/Ul1e3lIvgoI/AAAAAAAAA7k/zdgg0RkaQ
sk/s1600/flagfb.png
'/></a>
</td>
</tr>
</tbody></table></div></div>
</b:if>


  • To change the colour of the "Do you like this story..?" text then simply change #FF683F  with a color of your choice.
  • Replace NewBloggerWidgets  with your Feed title
  • Replace Blue color link with your Feedburner link
  • Replace Orange color link with your Twitter link
  • Replace Green color link with your Facebook link
  • Now save your template and you are done !

Note:- 

 This widget only shows below your posts not on homepage and give your feedback via comments.


Read More

How to Add a Widget Below First Post in Blogger

6 comments:


Follow the Step :


  • Log in to Blogger Dashboard.
  • Go to Template Click on Edit HTML.
  • Now Press CTRL+F keys to open Blogger Search box.
  • Now Find Bellow Code.

<b:include data='post' name='post'/>


  • Just bellow it add this code.


<b:if cond='data:post.isFirstPost'>
<div align="center" style="margin:10px auto;">
Paste your code here that you want to show
</div>
</b:if>


Note :

  • The red text indicates to where you should paste the code of the elements (eg. AdSense ad , widget, etc )               


Read More

Stylish Automatic slide recent post widget

1 comment:


Adding to Blogger :


  • Go to Blogger → Layout → Add Widget → HTML/JavaScript.
  • Past the below given code & save it.


<style scoped="" type="text/css">
/*
Made by newbloggerwidget.blogspot.in with lot of hardwork please keep visiting NBW
*/
ul.abt-sidebar-slider *{-moz-box-sizing:border-box;-webkit-box-sizing:border-box;box-sizing:border-box}
ul.abt-sidebar-slider{font:normal normal 11px Verdana,Geneva,sans-serif}
ul.abt-sidebar-slider,ul.abt-sidebar-slider li{margin:0;padding:0;list-style:none;position:relative}
ul.abt-sidebar-slider{width:100%;height:500px}
ul.abt-sidebar-slider li{height:24.5%;position:absolute;padding:0;width:49.5%;float:left;overflow:hidden;display:none}
ul.abt-sidebar-slider li:nth-child(1),ul.abt-sidebar-slider li:nth-child(2),ul.abt-sidebar-slider li:nth-child(3),ul.abt-sidebar-slider li:nth-child(4){display:block}
ul.abt-sidebar-slider img{border:0;width:100%;height:100%}
ul.abt-sidebar-slider li:nth-child(1){width:100%;height:49.5%;margin:0 0 2px;left:0;top:0}
ul.abt-sidebar-slider li:nth-child(2){left:0;top:50%}
ul.abt-sidebar-slider li:nth-child(3){left:50.5%;top:50%}
ul.abt-sidebar-slider li:nth-child(4){width:100%;left:0;top:75%}
ul.abt-sidebar-slider .overlayx,ul.abt-sidebar-slider li{-webkit-transition:all .4s ease-in-out;-moz-transition:all .4s ease-in-out;-o-transition:all .4s ease-in-out;-ms-transition:all .4s ease-in-out;transition:all .4s ease-in-out}
ul.abt-sidebar-slider .overlayx{width:100%;height:100%;position:absolute;z-index:2;left:0;top:0;background-image:url(https://blogger.googleusercontent.com/img/b/R29vZ2xl/AVvXsEhkTrlEEG_vShGfWHrBau0LY2CNDRFkLUROJfIMXheh3s9XLFc5viqMQVHkYWOSOiu1wEo7WkD7nRNkUI8c4bP7AZBHkViOpHtSSqHdGTiNtV-Nu85c2mLbgqmeTodl-rKJB0LjwiEVWOg/s1600/linebg-fade.png);background-position:50% 50%;background-repeat:repeat-x}
ul.abt-sidebar-slider .overlayx,ul.abt-sidebar-slider img{border:4px solid #2E8DCE;-moz-border-radius:3px;-webkit-border-radius:3px;border-radius:3px}
ul.abt-sidebar-slider li:nth-child(1) .overlayx{background-position:50% 25%}
ul.abt-sidebar-slider .overlayx:hover{-ms-filter:"progid:DXImageTransform.Microsoft. Alpha(Opacity=10)";filter:alpha(opacity=10);-khtml-opacity:0.1;-moz-opacity:0.1;opacity:0.1}
ul.abt-sidebar-slider h4{position:absolute;bottom:30px;z-index:2;color:white;margin:0;width:100%;padding:0 10px;line-height:1.5em;font-family:Georgia,Times,"Times New Roman";font-weight:normal}
ul.abt-sidebar-slider li:nth-child(1) h4,ul.abt-sidebar-slider li:nth-child(4) h4{font-size:150%}
ul.abt-sidebar-slider .label_text{position:absolute;bottom:10px;left:10px;z-index:2;color:white;font-size:90%}
ul.abt-sidebar-slider li:nth-child(2) .autname,ul.abt-sidebar-slider li:nth-child(3) .autname{display:none}
.buttons{margin:5px 0 0}
.buttons a{display:inline-block;text-indent:-9999px;width:15px;height:25px;position:relative}
.buttons a::before{content:"";width:0;height:0;border-width:8px 7px;border-style:solid;border-color:transparent #535353 transparent transparent;position:absolute;top:50%;margin-top:-8px;margin-left:-10px;left:50%}
.buttons a.nextx::before{border-color:transparent transparent transparent #535353;margin-left:-3px}
</style>
<div id="featuredpostside"></div>
<script src="http://ajax.googleapis.com/ajax/libs/jquery/1.8.0/jquery.min.js" type="text/javascript"></script>
<script src="https://dl.dropboxusercontent.com/u/76401970/All%20Blogger%20Tricks/abt-sidebar-slider.js" type="text/javascript"></script>
<script type='text/javascript'>
//<![CDATA[
FeaturedPostSide({
blogURL:"http://newbloggerwidget.blogspot.in",
MaxPost:8,
idcontaint:"#featuredpostside",
ImageSize:300,
interval:5000,
autoplay:true,
tagName:false
});
//]]>
</script>


 Customization:

  1. blogURL = add your blog URL here
  2. MaxPost = Total number of post
  3. Interval = Time taken to change the slider
  4. autoplay = true or false
  5. tagname = If you want to Display articles by tag/lable

If you have any problem comment below.

Read More